My Window Cornice Project...Tutorial
Before

After


This week I was busy constructing a cornice for my sliding door. I had made many of these before for other people and I also made an 18' cornice for our Relief Society room about 10 years ago. Now that I plan to stay in my apartment for many years to come; I finally took the time to dress up my windows. I love the way my cornice looks and my living room looks fabulous. I am going to make my bedroom cornice next week and then for another fun decorating project that I have on my to do list.
Here's how I made my cornice. Its 94" long.
Tools needed:
5 sturdy Styrofoam sheets
a hot glue gun & lots of glue sticks
2 boxes of thick round toothpicks
batting...
enough to cover the entire frame.
fabric..
enough to cover the sides, front and top of the cornice
trim
1 box of straight pins
level
Step 1...I measured the length, width and height of my desired cornice. When you make this measurement always remember to measure and cut your foam to go a few inches beyond the curtain rod so you don't see the rod at all and make sure it has a nice height towards the ceiling.
Step 2... Measure the foam and mark your measurements with your level for an even leveled line.


Step 3...I marked all my measurements. Once all my pieces were marked, then I start to construct the frame of my cornice.
I used toothpicks as anchors to unite my frame together with hot glue. I made sure I glue them well.


Once the pieces are united glue the outer edges and don't worry about the mess of glue this will not be seen after the batting and fabric goes over it.

I put the toothpicks on the bottom of the frame before placing the top front part on it. I also united these two pieces together with lots of glue. And the sides were cut and glued also.

This is how your construction should look like. As you can see the white foam that is facing the floor is the front part of my cornice and the green foam is the back part.

I anchored my foam sheets together by putting a piece of foam where the two large foams pieces united for a sturdier construction.

Once the construction is done then the batting begins. Glue well all the edges of the batting and make sure that you "lightly" pull the batting without taring it for a firmer tighter fit. This fit will hold together the construction of the cornice better.

Make sure to cover well the entire construction with batting.


Once your frame is completely covered in batting then you can start upholstering it.
I made sure the fabric was placed properly and evenly in the front of my cornice first before I started gluing the edges. I used straight pins to hold my fabric in place before I glued it, and just like the batting I pulled my fabric tightly for a firmer tighter fit. That held the entire construction together.

After all the upholstering was finished, I then checked the entire cornice to make sure all the fabric was even and placed properly; then I started to glue my trim.

I used two different trims in the same color.
A straight flat trim and a rope designed trim. It looks great.

Now to finish and seal my work, I covered the inside and back part of the cornice with white fabric. This fabric is the one that faces the outer part of the window (street view) and it wraps itself towards the top of the cornice, like the photo below. Make sure all the fabric is well placed and all the seams are even and tightly pinned with straight pins and glued.

Here is the finsihed cornice. Its 94" long.
On the back part of the cornice that faces the outer wall I sewed and glued 5 picture frame holder that I placed evenly throughout the length and back frame of the cornice. I also glue 2 medium size "L" brackets on each corner inside the
cornice for a better support and to prevent the wind from blowing the cornice off the wall. (Sorry... I completely forgot to take a photograph of the picture hangers and brackets on the back of the cornice before we hung the cornice up.)
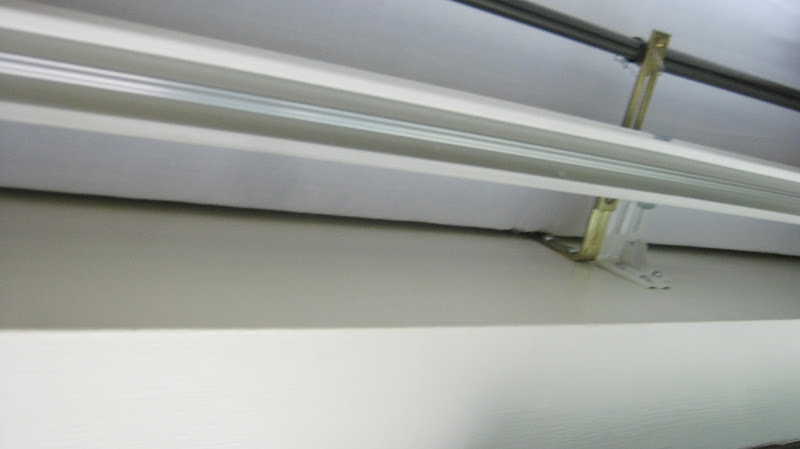
I did take some photos of the brackets after the cornice was hung and here they are.

One part of the bracket goes towards the wall and the other one goes to the upper part of the cornice. The brown bracket is my curtain rod holder and the white brackets are for my vertical binds.
Here is a diagram on where to put your brackets and screws on your cornice.


I hope this helped and I just noticed I forgot to put the "s" on the word against...sorry, Its been a crazy day.
Here is my complete cornice.


Here it is all hung up.


I never would have thought to use styrofoam... what a great idea!
ReplyDeletethe great thing about using styrofoam is the lightness in weight and it doesn't cause any damage to the wall, especially for an apartment dweller like me.
DeleteWow! I'm impressed! Looks very nice and what a great idea to use styrofoam! You are giving me ideas... :)
ReplyDeleteHi lovlie, I've missed you...I hope your creative juices begin to create some beautiful cornices. If you do make sure yo post them.
DeleteWow! You did such an amazing job with the window and with this tutorial! Beautiful!
ReplyDeletethank you Jocelyn.
Delete